How to Change The Lettering on Your Re-Usable Vinyl Banner
For more information on lettering for reusable banners, please read on the description tab below.
If you wish to request a quote, please email and we will be able to assess your project and get back to you as soon as possible.
Request a Quote
Description
How to change the lettering on your re-usable vinyl banner
Just imagine you have a banner from us and we offer the chance for you to update it yourself. Your banner will have arrived with all of its first set of information on. Your event is over, you have stored the banner clean and carefully ready for your next event. But now you are 6-7 weeks from that event and you need to learn how to change the lettering on your re-usable vinyl banner!
How to order
- We keep records of all the banners we make and keep them for many years, so it is just a case of ">emailing us and telling us the dates of your next event.
- Remind us of the number of banners you are planning to use (especially important if you are regular customers and we have made multiple ones in the past)
- Remember to give us your despatch address – we don’t keep this information on file
- In the next week you will receive your replacement lettering. It is made from a flexi vinyl especially designed for banners, so it is really easy to change your lettering.
- We charge by the meterage for the lettering and will be able to tell you this price once your original design is finalised. Most banners of 2-3 metre cost £30ish to update, but this does vary by the amount of information being changed. We guarantee it will never cost more than 2/3rds of the original price.
How to apply your re-usable banner lettering
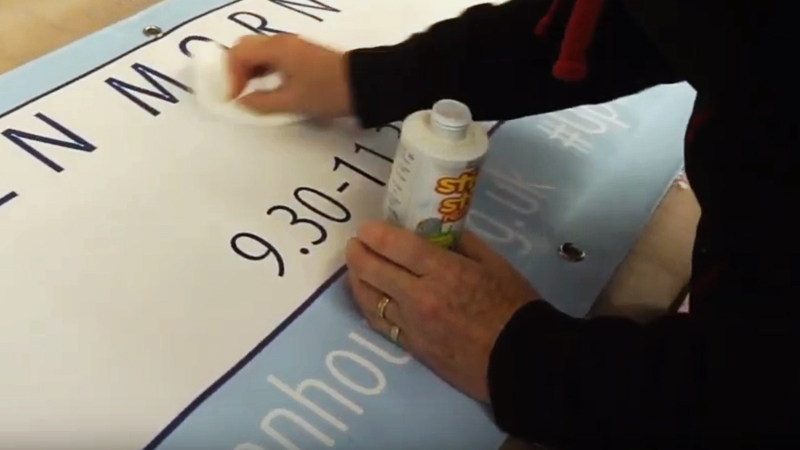
This video explains exactly how to change the lettering on your re-usable vinyl banner.
You will need
- a hairdryer or hot water bottle (to remove the existing lettering)
- stick remover product (we recommend DeSolvIt, but nail polish remover or even white spirit will also work)
- An old credit card (to scrape up the old adhesive sludge – lovely!)
- Clean water (to wash it very clean of stick otherwise dirt will stick and create a shadow)
- Kitchen towel or wipe (to dry it off as the new vinyl needs a dry clean surface to adhere to)
- ruler or tape measure (to ensure you get the new graphics straight)
- Masking tape (to hold the new graphics in place)
- Scissors (to cut the new graphics into manageable pieces once you have ‘hinged’ them in place)
Do get in touch if you have any problems, but your banner will look exactly like new at the end. No nasty patches.
Be warned, the process is highly addictive! We hope you will come back and repeat the exercise for many years, keeping the vinyl banner out of land fill.
Additional Information
| Postage | Standard Fee |
|---|


